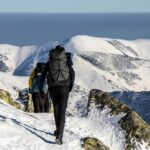
Zion National Park is one of the most beautiful places to visit in the United States, especially for people who love hiking and outdoor adventure. Among all the trails in the park, Angels Landing is the most famous and the most thrilling. This hike takes you to a narrow ridge with breathtaking views on both sides. It is also known for its steep drop-offs, long climb, and the exciting chain section that leads to the final viewpoint. Because of its popularity and difficulty, proper preparation is very important. This detailed step-by-step guide will help you understand everything you need to know before starting the Angels Landing hike so you can stay safe and enjoy the trip.
Zion National Park receives millions of visitors every year, and Angels Landing is one of the biggest attractions. The trail is not extremely long, but it is intense and physically demanding. Many people visit the park without proper planning, which makes the trail feel harder and more stressful. To help you avoid common mistakes, this guide explains permits, difficulty level, route details, fitness preparation, packing tips, and safety guidelines in a simple and easy-to-understand manner.
Before beginning the hike, it is also a good idea to have a clear travel plan, know the weather, and understand the rules of the park. Proper preparation will make your trip safer and more enjoyable. You can also check helpful travel tips and guides on WhiteHatFinance.com to plan your journey better.
Understanding the Angels Landing Permit System
To control overcrowding and ensure hikers stay safe, Zion National Park uses a permit system for the Angels Landing trail. The chain section is narrow, and only a limited number of people can safely walk on it at a time. Because of this, you must apply for a permit through a lottery system before your trip. The lottery opens at different times of the year, and you must choose the day and time window when you want to start your hike.
It is important to remember that walking the trail without a permit is not allowed. Rangers often check permits along the way. If you want the best chance of getting a permit, apply early and keep your travel dates flexible. Many people who fail to get a permit for their preferred date still get lucky with alternate time slots. If you are visiting during busy seasons like spring or fall, the competition for permits will be higher, so plan ahead.
Know the Full Route Before You Begin the Hike
The Angels Landing hike starts at the Grotto Trailhead. From there, you follow the West Rim Trail, which is a steady uphill path. The climb begins almost immediately, but the views are beautiful throughout the way. After walking for some time, you will reach a famous part of the trail called Walter’s Wiggles. These are 21 short switchbacks that feel steep but are well-constructed and safe. This section tests your fitness, but it is also one of the most memorable parts of the hike.
At the top of Walter’s Wiggles, you arrive at Scout Lookout. This is an open resting area where many hikers take a break before continuing toward the chains. If you think the hike is too challenging, this is a good place to stop, enjoy the view, and return safely. The final chain section is the hardest part of the trail. The path becomes narrow, and you hold onto metal chains for support. There are steep cliffs on both sides, but as long as you go slowly and pay attention, the trail is manageable. Many people describe this section as thrilling rather than dangerous.
The final viewpoint at Angels Landing provides a stunning 360-degree view of Zion Canyon. You can see tall cliffs, deep valleys, and the Virgin River winding through the park. The feeling of standing at the top after completing such a challenging hike is unforgettable.

Train Your Body for the Hike
Even though the Angels Landing trail is not very long, it requires good fitness. The steep climb, switchbacks, and chain section make it tough for beginners. If you are new to hiking, start training a few weeks before your trip. You can practice by walking uphill, climbing stairs, and doing simple leg exercises like lunges or squats. A stronger body will help you move confidently and enjoy the hike without getting tired too quickly.
Along with physical training, practice long walks to improve your stamina. The hike can take anywhere from three to five hours depending on your speed and resting time. Drinking plenty of water and eating energy-rich food before the hike will also help maintain your strength.
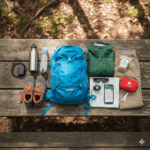
Pack Only the Most Important Essentials
Carrying the right items is extremely important for this hike. Because the trail is steep, you should keep your backpack light. Always bring at least one to two litres of water, because there are no water refill stations along the trail after you start. Wear comfortable shoes with strong grip because the rocky surface can become slippery.
It is also a good idea to bring sunscreen, a hat, snacks, and a light jacket. Weather in Zion National Park changes quickly, so having an extra layer can protect you from wind or cold. If you are hiking very early in the morning, a headlamp may also be helpful.
Start Early to Stay Safe and Avoid Crowds
Angels Landing is one of the busiest trails in Zion National Park. This means the chain section becomes crowded after mid-morning. To avoid waiting in long lines and to enjoy a more peaceful experience, start your hike early. Morning hours are also cooler, which makes climbing easier.
If you have a permit slot for later in the day, make sure you plan enough time to finish the hike before sunset. Hiking the chain section in darkness is unsafe, especially for beginners. Always check sunrise and sunset timings before heading out.

Follow Safety Tips on the Chain Section
The chain section is the most exciting part of the hike, but it is also the place where you need to be most alert. Always use both hands to hold the chains, especially in places where the path becomes narrow. Walk one step at a time and never rush. If someone behind you is walking faster, find a safe spot to let them pass.
Be careful while taking photos. Many hikers make the mistake of trying to take pictures while moving, which can lead to slips. It is better to stop safely, hold the chains, and then take your photos.
If the weather is rainy, windy, or stormy, avoid going to the chain section altogether. Wet rocks become slippery, and strong winds can affect your balance. Your safety is more important than reaching the viewpoint.
Enjoy the Views Without Rushing
One of the best parts of Angels Landing is the beautiful scenery in every direction. As you climb higher, the canyon walls look grand and majestic. The sunlight changes the colors of the rocks throughout the day, making every angle unique. Take your time to stop and enjoy the views. Hiking is not just about reaching the end point; it is about the journey and the moments you experience along the way.
If you want to read more helpful travel and hiking guides, you can also visit WhiteHatFinance.com for detailed travel tips.
FAQs
Is Angels Landing safe for beginners?
The hike is challenging but safe if you are physically prepared and follow the rules. Many beginners complete it successfully by moving slowly and staying alert.
How long does the hike take?
Most people take between three to five hours depending on their speed and number of breaks.
Do I need a permit for the hike?
Yes, a permit is required for the chain section. You must apply in advance through the official lottery system.
What is the best time to hike Angels Landing?
Spring and fall offer the most pleasant weather. Summer months are very hot, and winter conditions may bring ice.
Can I hike without holding the chains?
No, the chains are there for your safety. Always use them to maintain balance.